
Prerequisites
Installation
Before you get started you will need to have NodeJs installed on your system as all of the celaris commands are run through Node.
NodeJs
INFO
Node.js is required for building Celaris applications, as it manages the JavaScript dependencies.
To install Node.js, visit the official Node.js website and download the latest stable version (LTS) suitable for your system. During installation, ensure that the Node.js runtime and npm (Node Package Manager) are included.
After installation, confirm Node.js is properly set up by opening a terminal or command prompt and running the following commands:
node -v
npm -v
WARNING
On linux (possibly macOS) if you use sudo apt install npm you will likely get an older version of node installed. It is recommended to install following the instructions in the link above!.
If you have already used this command, run the following command to undo this:
sudo apt remove npm -y && sudo apt remove nodejs -yand check the packages are removed:
node -v
npm -v
OS Specific Instructions
You will also need to ensure your system has the right dependencies for C++ and WebView development. How you do this will vary depending on your operating system.
Configuring Windows
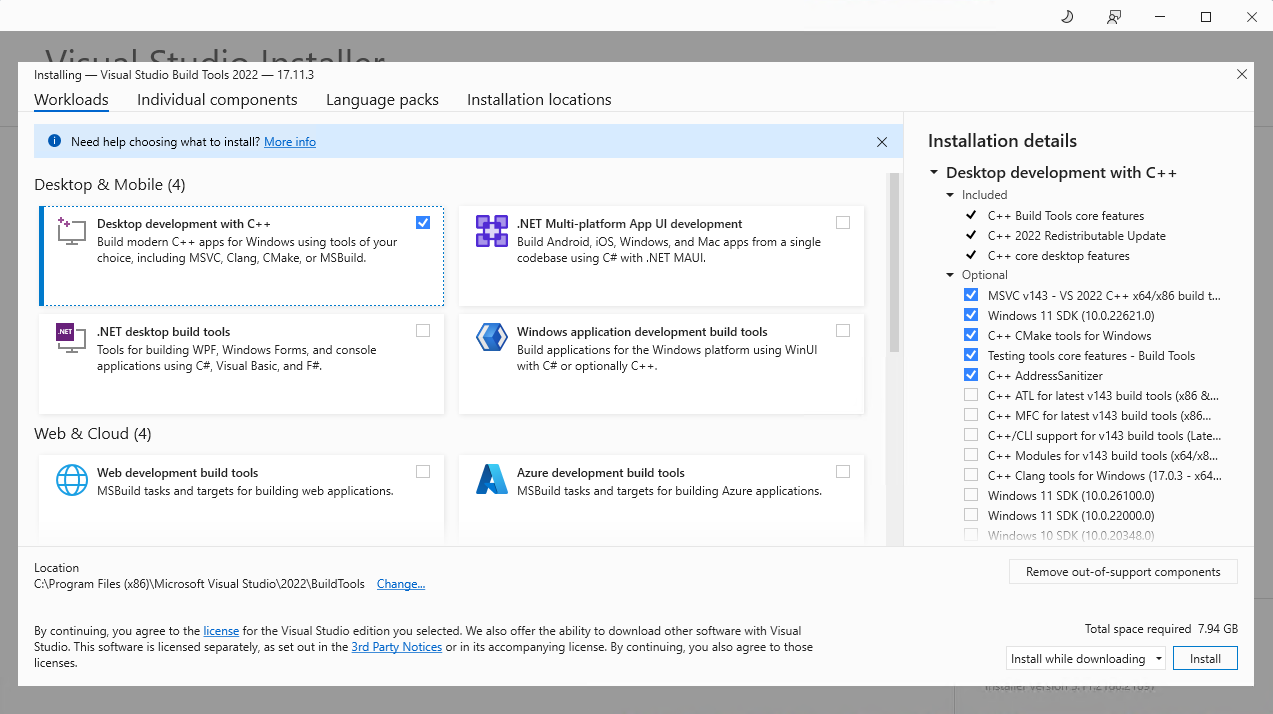
1. Microsoft Visual Studio C++ Build Tools
To begin, you'll need to install the Microsoft Visual Studio C++ build tools. The simplest approach is to download and install the Build Tools for Visual Studio 2022. When choosing workloads, you need to make sure to select both "C++ build tools" and the Windows 10 SDK. However, since we will be using CMake as well, you may as well just accept the defaults, as shown below.
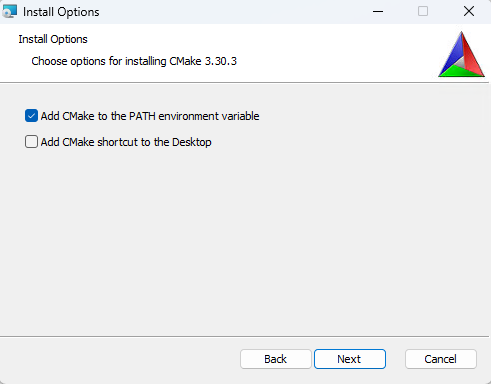
2. CMake
Next you need to download CMake itself. Head to the Official CMake Download Page and grab the installer that matches your system.
INFO
Be sure to add CMake to the PATH environment variable when prompted
When installation is finished ensure everything is working by running the following command.
cmake --version3. Git
Next you want to install git on your system. Git is used to fetch packages during the build operation and is just generally good practice to have on your system.
Get git from the Official Download Page
Select the default components
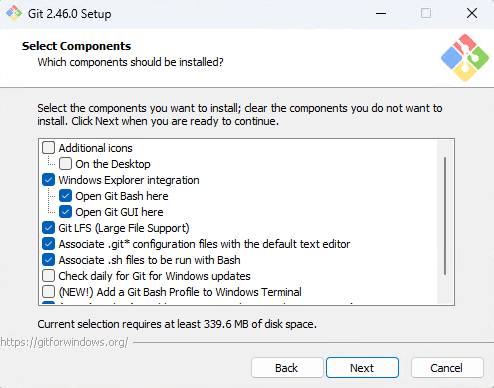
Feel free to change the default editor from vim, but don't tell anyone that uses vim or they will likely get offended (anybody else is fine).
When prompted, unless you're in a legacy team that still use
masteras a branch name by convention, you should change the default branch tomain.Leave other options as default by clicking next through the following screens.
When installation is finished ensure everything is working by running the following command.
git -v4. WebView2
INFO
On Windows 10 (version 1803 and later with all updates applied) and Windows 11, the WebView2 runtime is included with the operating system.
Celaris relies heavily on WebView2 for rendering web content on Windows, so it’s essential to have WebView2 installed. The simplest way to do this is by downloading and running the Evergreen Bootstrapper from Microsoft's website.
The bootstrapper will automatically detect the appropriate architecture and version for your system. However, if you encounter issues (particularly with Windows on ARM), you can manually choose the correct standalone installer.
Configuring Linux
There are several development dependencies required for developing, building and releasing Celaris projects. For example, a C++ compiler, CMake (for C++) and webkit2gtk for the webview engine. These dependencies will be installed in different ways depending on your linux distribution.
sudo apt update
sudo apt install libwebkit2gtk-4.0-dev \
    build-essential \
    curl \
    wget \
    file \
    libssl-dev \
    libgtk-3-dev \
    libayatana-appindicator3-dev \
    librsvg2-dev \
    cmake
INFO
If you use a distribution not mentioned here, please submit specific instructions for how you would install the above packages on your distribution as an issue on github
Configuring MacOS
CLang can be installed on MacOS with a single command.
xcode-select --installThis will install all of the command line tools for building various types of applications on MacOS. This includes Clang.
Install CMake
coming soon